
Getting practice management software implementation right isn't just an IT project—it's a clinical and operational turning point for your practice. A misstep here doesn't just slow your team down; it creates billing errors, compliance gaps, and staff frustration that take months to untangle.
That's why a structured, phased approach makes all the difference. Breaking implementation into clear phases helps you tackle the hurdles—data migration, staff adoption, and workflow configuration—before they become full-blown disruptions.
How I Break Down the 10 Phases of Implementation
Here’s how I approach each step of practice management software implementation to keep projects moving forward and avoid costly headaches:
1. Project Planning and Team Assembly
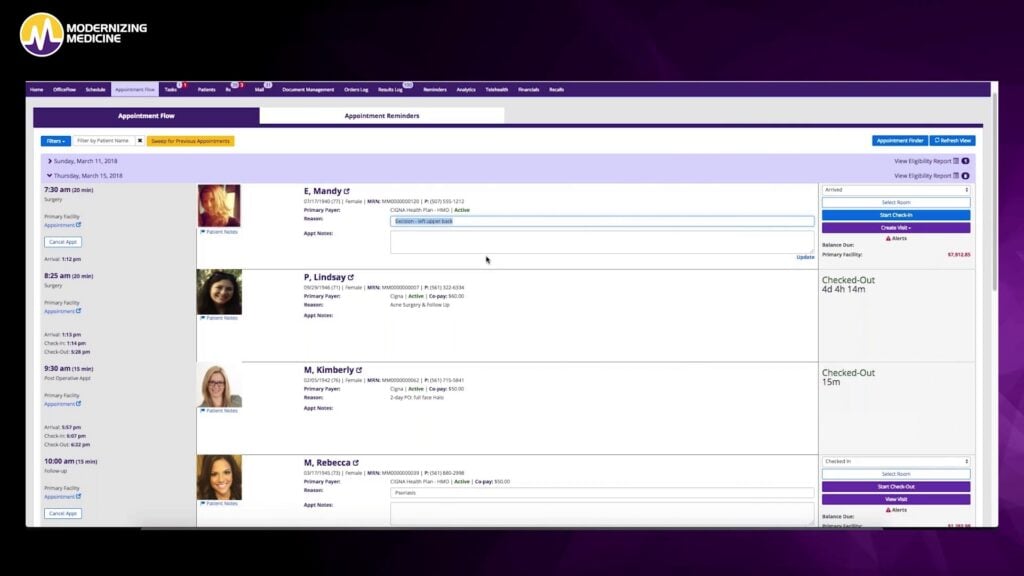
The first thing I do is pull together a core project team with representation from clinical, administrative, and IT. I want every department that the software will touch to have a voice right from the start—nurses, billing leads, front desk staff, and at least one executive who can make decisions quickly. This balance helps flag workflow quirks early and builds trust for the changes ahead.
I work with the team to map out project goals, set a launch timeline, and clarify everyone’s roles. It’s tempting to jump straight to feature wishlists, but understanding the potential pros and cons of practice management software helps me slow down and outline backup plans for staff coverage and data access so day-to-day operations aren’t sidelined.
During implementation, assuming the IT team will “handle it all” can leave important responsibilities unassigned and create gaps later in the process. The sooner everyone is accountable, the less likely the project will get derailed when schedules, budgets, or workflows start shifting.
I use these strategies to make team assembly and planning run smoother from the outset:
- Include frontline staff: Make sure clinicians, front desk, and billing teams are represented.
- Name a decision-maker: Assign someone with real authority to break deadlocks fast.
- Document workflows: Have each department write down current processes for reference.
- Schedule weekly check-ins: Early and regular meetings keep everyone on track.
- Prepare backfill coverage: Don’t pull core staff into project work without a plan for patient care and admin duties.
2. Current-State Workflow and Data Assessment
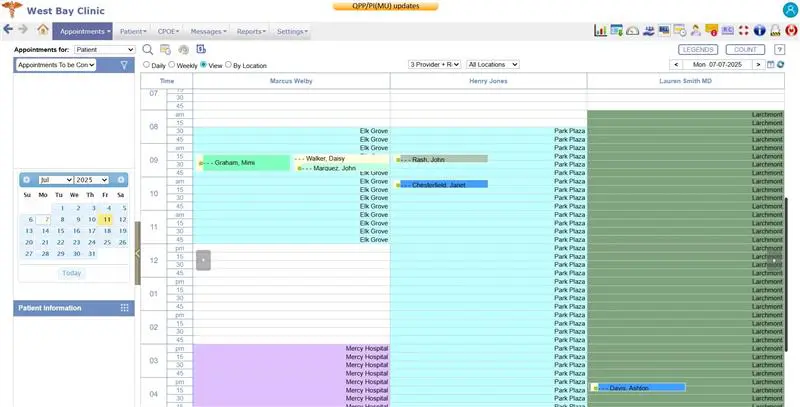
I start this phase by shadowing staff through patient intake, scheduling, billing, and reporting—if I can see every workflow in action, I know which details actually slow people down. I always ask the team to walk me through the exceptions and the “this only happens on Fridays” tasks because those details make or break a smooth transition.
For data assessment, I pull real reports to see what’s stored in the old system, what’s being tracked on spreadsheets or paper, and where duplicate or outdated information lives. I loop in everyone who manages or touches data entry, since small gaps here always become big issues later. Rushing here and missing out-of-date processes can cause delays, costly cleanup work, or even compliance risks down the road.
Check this table to see how I approach mapping workflows and gathering data details at this stage:
| Area | What to Review | Who to Involve |
|---|---|---|
| AreaScheduling | What to ReviewDaily/weekly appointment flow | Who to InvolveFront desk, nurses |
| AreaBilling | What to ReviewHow charges and payments are tracked | Who to InvolveBilling staff |
| AreaReporting | What to ReviewCustom reports, manual logs | Who to InvolveAdmin, management |
| AreaData Storage | What to ReviewWhere files and forms are kept | Who to InvolveIT, office admin |
| AreaEdge Cases | What to ReviewUnusual or exception scenarios | Who to InvolveAll department leads |

3. System Configuration and Customization
I typically set aside dedicated days for building out templates, user permissions, and calendar settings, with plenty of input from staff who’ll use the system every day. It’s crucial to match settings to the practice’s real routines—appointment slots need to fit how providers work, custom fields have to reflect what you actually track, and no one should have access to data they don’t need.
I’ve seen teams mishandle practice management software customization in two ways: they either skip key configurations and end up with generic workflows that slow everyone down, or overcomplicate the system by enabling too many bells and whistles that nobody uses. I like to document specific configuration choices and review them with both the vendor and the core team before going live. That way, if something doesn’t work in practice or needs to be adjusted during the pilot, we can trace each setting back to the right conversations.
I keep these tips in mind during system setup to avoid future headaches:
- Stick to essentials: Start with features the team truly needs and build from there.
- Maintain clear permissions: Limit access to sensitive data and review user roles with your compliance lead.
- Test with real scenarios: Run a few patient flows from scheduling through billing before sign-off.
- Log every setting: Track what you tweak and why, so you can undo changes if needed.
- Get vendor input: Double-check tricky configurations with vendor support before launch day.
4. Data Migration and Validation
I always treat data migration as its own mini-project and bring in both vendor specialists and in-house experts who know the old system’s quirks. Before moving anything, I take time to clean and organize the data—merging duplicates, fixing obvious errors, and archiving records we don’t want to carry over. Getting sample sets into the new system early lets me check if patient histories, appointments, and balances land where they’re supposed to, not just somewhere on the backend.
After the first import, I ask end users to spot check real records before moving forward. Sometimes, things look fine until you try searching by insurance or running a batch billing report. I find it’s faster to assign very specific validation tasks to staff who know their part of the workflow best. By double-checking the output and not assuming the “import finished” message means everything is perfect, I avoid a lot of post-launch headaches.
Follow these steps to help make your data migration cleaner and safer:
- Audit legacy data: Remove duplicates and outdated records before migrating.
- Test with small data sets: Start with a subset of real records in the new system.
- Assign validation tasks: Have billing, clinical, and admin staff each check their own daily-use records.
- Document mismatches: Track anything that doesn’t land correctly and follow up in real time.
- Get sign-off before moving all data: Only proceed once every group has confirmed their sample checks look right.
5. Integration With Existing Systems
Integrating your new practice management software with EHR platforms, billing services, or appointment reminder tools always takes more coordination than it seems. I bring both IT and department leads into technical walkthroughs to clarify exactly which data has to move between systems, how often those updates should run, and what happens if a sync fails. Early on, I set up test connections and run sample transactions to double-check that data fields match and workflows stay intact.
I keep a close eye on interface compatibility and version changes, since integration points can break every time another system gets updated. Documenting the technical setup isn’t enough—I also ask teams to describe what success looks like for each integration. If one department expects instant updates and another only needs nightly syncs, that detail helps set realistic expectations and avoid confusion. Delays tend to pop up when nobody owns the integration or when assumptions about what’s “automated” aren’t made explicit.
Watch for these early missteps that can slow down or derail integrations:
- Skimping on testing: Run real-world scenarios, not just technical test data, to catch missed gaps.
- Assuming automatic syncs: Double-check how and when information updates between systems.
- Overlooking user experience: Check that staff see the right info in each system after an update.
- Skipping version checks: Make sure integrations stay compatible after software updates or patches.
- Leaving IT out of workflows: Have IT and end users talk through handoffs, especially during go-live and after-hours support.
6. Staff Training and Change Management
I find that hands-on software training works best when it’s built around real patient scenarios. I pull in team leads and power users to co-teach sessions and help others work through daily tasks like appointment scheduling or charge entry. Recording quick-reference videos or creating simple cheat sheets also gives staff something to fall back on when the inevitable “How do I do this?” questions come up weeks later.
Change always comes with pushback, so I make space for people to air frustrations or questions early. Finding champions in every department who can spot workflow snags and give honest feedback turns formal training into an ongoing process. I set up a feedback loop—either weekly huddles or a shared log—so everyone knows where to ask for help or suggest tweaks once they’re back at their desks. That support usually makes adoption stick and keeps small problems from growing.
Use this list to build stronger engagement and boost retention during training:
- Mix up formats: Combine in-person walkthroughs, quick videos, and written reference guides.
- Invite feedback early: Let staff suggest edits or flag confusing steps before go-live.
- Assign department champions: Pick top users to answer questions and model best practices for their teams.
- Check real-world understanding: Have team members demonstrate tasks with real patient examples, not just demo data.
- Keep a running FAQ: Update answers as new questions and hiccups come up in the first weeks.
7. User Acceptance Testing
I always involve end users from every department for user acceptance testing, not just IT or power users. This phase is where the people who rely on the system every day run through core tasks—think checking patients in, posting payments, and sending reminders—to see if workflows match the real world. I block off dedicated time and create test scripts that walk through jobs exactly as they’ll play out once the system is live.
In my experience, the most useful feedback comes when staff actually enter fake patients or claims and try to break the system. I encourage them to document any confusing steps or features that slow them down, instead of working around things just to make the test pass. When you collect that list and review it with your vendor, issues get fixed faster and you avoid last-minute changes after go-live. That’s what makes user acceptance testing worth the effort.
Review this checklist to make sure your user acceptance testing gets real results:
- Test with actual end users: Invite billing, front desk, and clinical staff—not only super users or IT.
- Use real-world workflows: Base test scripts on real scenarios, not just vendor demos.
- Track every issue: Log confusing steps, errors, or missing features right away.
- Schedule extra time: Allow for a few rounds of testing and revision before sign-off.
- Confirm fixes: Re-test after changes to ensure issues are truly resolved.
8. Go-Live and System Deployment
When it’s time for go-live, I bring in extra support—both from the vendor and in-house champions—so staff have someone to turn to when questions pop up. I always plan for the go-live date to fall during a quieter period, like a midweek afternoon, and never right after a holiday or major system update. This way, there’s bandwidth to address issues without derailing patient care or daily operations.
I keep everyone focused on essential practice management software features, including patient check-ins and billing workflows, before introducing more advanced functionality. Having a clear plan for temporarily reverting to the old system gives everyone peace of mind if a critical issue arises. Teams also benefit from quick huddles at the start and end of each shift to share updates and surface urgent problems that need immediate attention. This approach keeps operations steady as everyone adjusts to the new system.
Follow these steps to help your go-live run more smoothly for everyone:
- Schedule carefully: Pick a soft launch date when patient volume is low.
- Prep a support squad: Station vendor reps and in-house champions on the floor for questions.
- Focus on basics first: Prioritize must-have workflows—hold off on less crucial features.
- Host daily check-ins: Meet at shift changes to catch problems and adjust quickly.
- Keep a rollback plan handy: Make sure you can switch back if something major goes wrong.
9. Post-Launch Hypercare and Issue Resolution
Right after go-live, I set up a short-term “hypercare” phase, keeping extra support on standby for the first few days or weeks. I ask staff to log every question, error, or hiccup in a shared tracker—nothing’s too small—and I review this log with both IT and vendor contacts daily at first. This helps us spot patterns quickly, fix urgent blockers, and reassure staff that their feedback matters.
Most problems during hypercare aren’t technical—they come from unexpected workflow questions or people reverting to old habits. I keep team leads in the loop and encourage them to check that new processes are really being followed. Clear communication channels, fast response to issues, and regular status updates keep everyone invested. Once things settle down and the number of new issues drops, I transition back to routine IT and vendor support.
Check this table for quick guidance on what to do—and what to avoid—during hypercare:
| Do | Don’t |
|---|---|
| DoLog every issue, no matter how small | Don’tDismiss user concerns as minor |
| DoReview logs daily with IT and vendor | Don’tWait for issues to pile up |
| DoReinforce new workflows with team leads | Don’tAssume everyone’s following new steps |
| DoKeep extra support channels visible | Don’tClose up extra support too soon |
10. Ongoing Optimization and Performance Review
After the dust settles, I schedule routine check-ins to review how the system is performing against your practice’s goals. This means actively tracking metrics like appointment flow, billing speed, and error rates—then connecting with staff to see if anything’s gotten harder or easier. I loop in department leaders, IT, and even the vendor if updates or retraining are needed.
Over time, staff will spot new ways to make processes smoother or request features that seemed unnecessary at first. These ideas often come up once everyone’s comfortable and real-world use uncovers new needs. I keep a rolling improvement list and review it at least quarterly with the team. That way, user feedback keeps shaping how you use the system—not just during launch, but for the long haul.
Use these best practices to keep your system working for your team—not against them:
- Set time on the calendar: Commit to quarterly or monthly performance reviews.
- Bring everyone to the table: Include feedback from every role, not just leadership or IT.
- Focus on measurable impact: Tie ideas for changes back to specific data or user experiences.
- Follow through with action: Track fixes and new requests so improvements don’t stall out.
- Keep learning: Schedule regular training refreshers as features or workflows evolve.
More Articles
Top Practice Management Software to Consider
Here's my shortlist of the best practice management software solutions:
Best Practices for a Successful Practice Management Software Implementation
Even the best software can run into trouble without good planning and follow-through. Use this table to spot common pitfalls and see what you should do instead:
| Don’ts | Instead, Do |
|---|---|
| Don’tsSkip end-user input during selection | Instead, DoInclude feedback from clinical, admin, and billing staff early |
| Don’tsMigrate all documents and templates at once | Instead, DoPrioritize and test key files and templates before full migration |
| Don’tsRely only on vendor-provided training | Instead, DoSupplement vendor sessions with real-world scenarios and hands-on practice |
| Don’tsUnderestimate downtime or staff disruption | Instead, DoBlock time for training and plan for reduced productivity at go-live |
| Don’tsIgnore small workflow issues after go-live | Instead, DoTrack and resolve even minor pain points quickly to build trust |
| Don’tsLeave optimization to IT or “super users” only | Instead, DoMake regular improvement reviews a team-wide responsibility |
Ready to Find Your Practice Management Software?
If you're working through implementation planning and still need to compare your options, browse medical practice management software reviews and comparisons to find the right fit for your team's clinical and operational needs.